

A new web version of ProgressionLIVE will be released soon!
This Web 4.71 Update is mainly about displaying an unread priority comment when opening a task and creating email templates to send to the client from a task. We update regularly to provide you with a better experience with ProgressionLIVE dispatch software.
Web 4.71 Update
This update will be deployed starting April 22, 2019.
Displaying an unread priority comment when opening a task
On November 1st, we deployed a new feature to display a priority comment when opening a task on our mobile application.
So, at the great request of our users, we are now deploying the same process for our web interface. Indeed, it will now be possible to create a priority comment and it will appear at each opening of the task as long as the button Mark as read is not clicked.
In summary, a priority comment is visible to all users who open the task as a result of its creation, until it is marked as read.
Create a priority comment
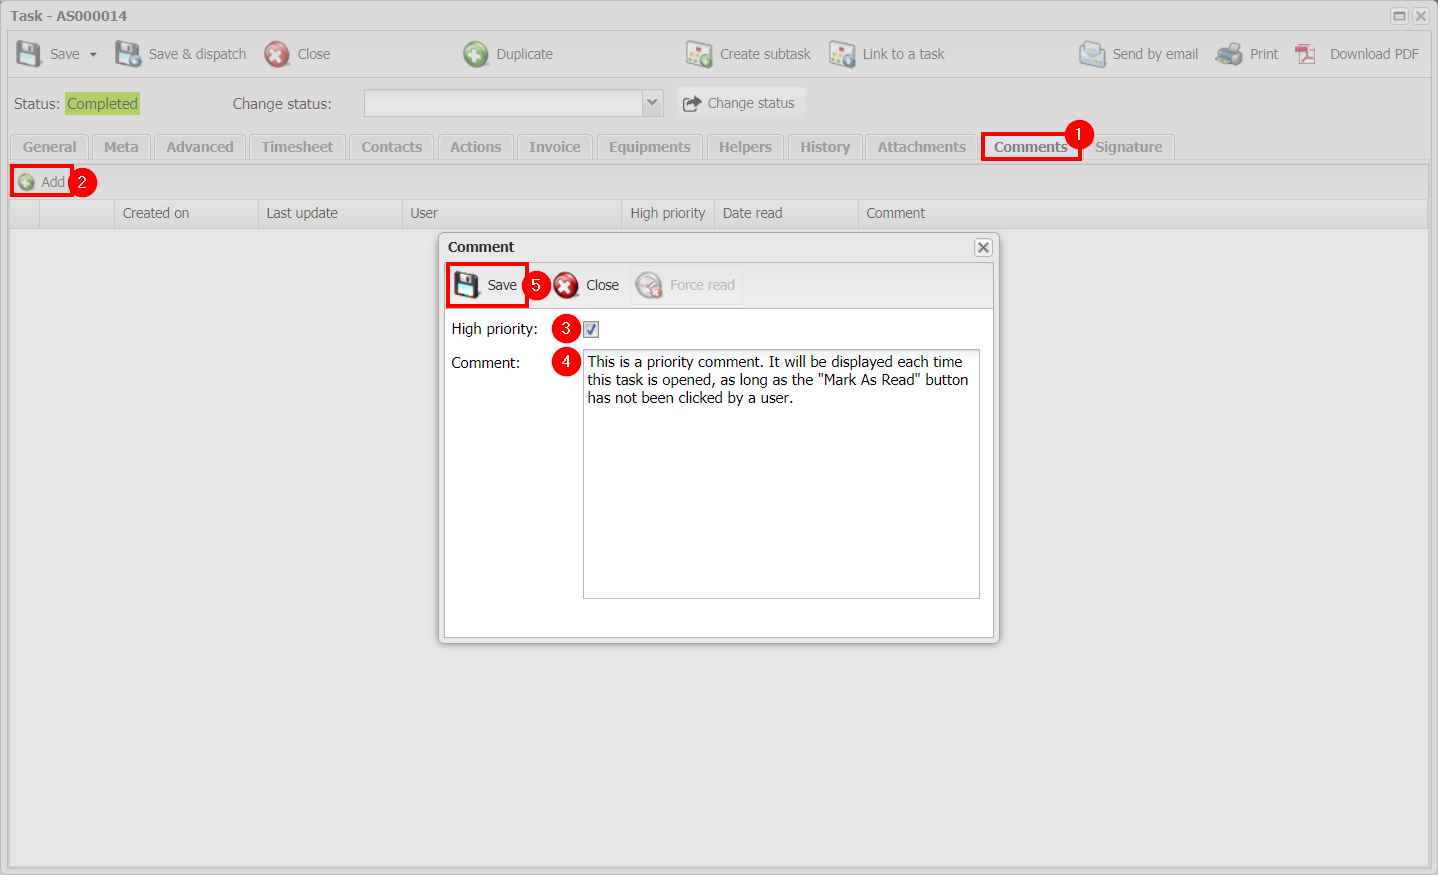
- In a task, click the Comments tab
- Click Add
- Check the High priority box
- Write your message in the Comment field
- Click Save
Displaying the comment
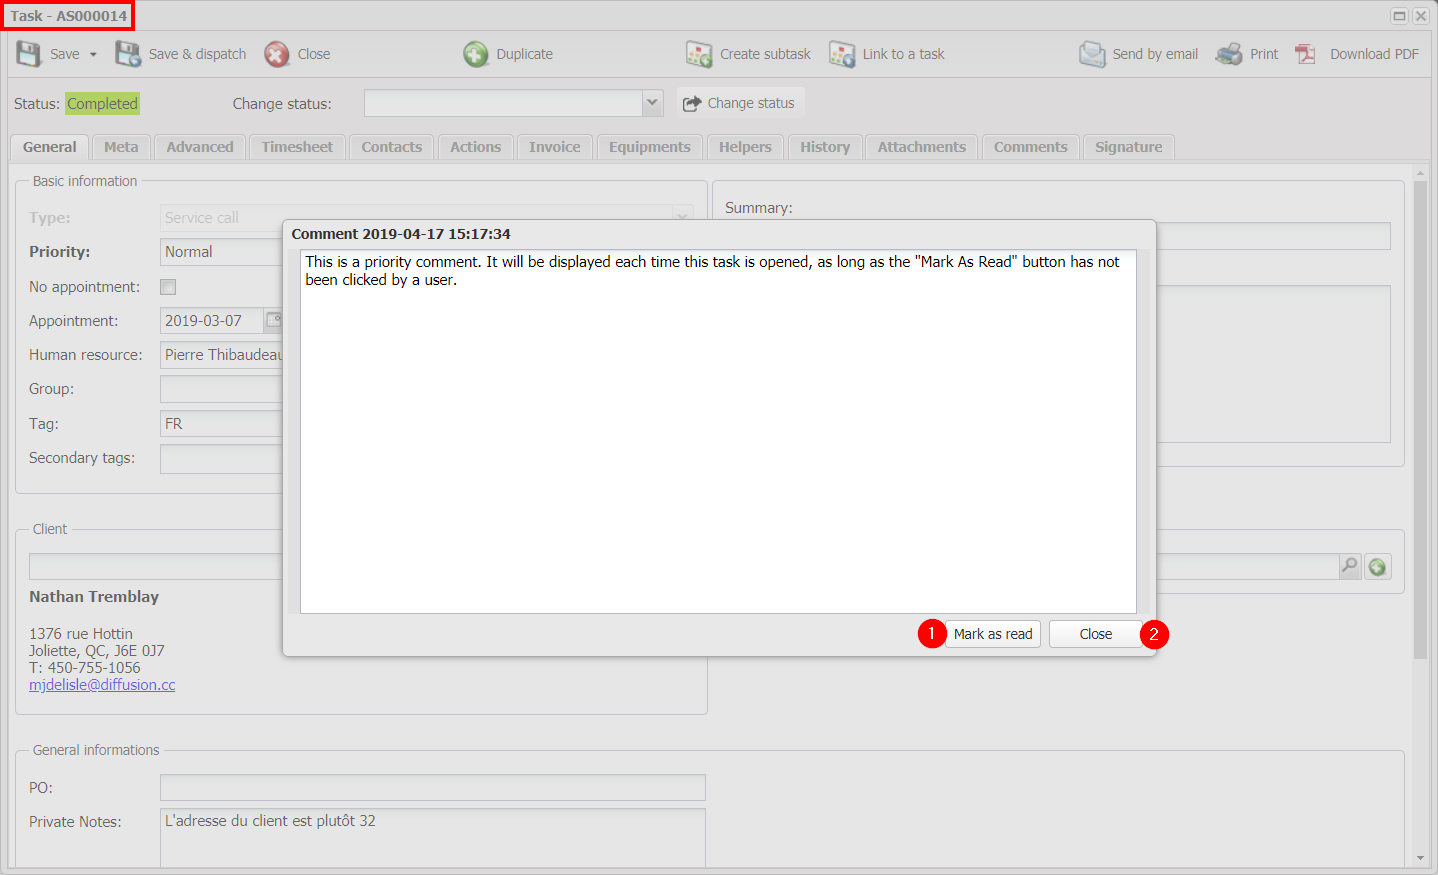
- By clicking Mark as read, the message will no longer be displayed for any user.
- Clicking Close will discard the message, but it will reappear when the task will be re-open.
Creating email templates to send to the client from a task
We have developed a new feature that allows you to create email templates. You can, from a task, send an email with or without the PDF and attachments, depending on the template you have created.
You can change the text formatting:
- – Change the font and its color;
- – Text in bold, italic, underlined or highlighted;
- – Enlarge or reduce the size of the font;
- – Align text to left, right or center;
- – Insert a hypertext link;
- – Create a numbered or bullet list;
You can also add fields from the task:
- – Name and address of the client or location;
- – Code, type and state of the task;
- – Date of creation and last update of the task;
- – Summary and description of the task;
- – Name of the human resource;
- – Date and time of the appointment;
- – Subtotal or total of the task;
- – Dynamic properties and custom fields to the task type;
- – etc.
WARNING: The Configuration section may only be accessible to administrators and should be used with caution! Changing a setting in another section may cause your account to malfunction. Fees may apply to restore the situation. If you have any questions about an item from Configuration section, please contact our technical support.
Creating the email template
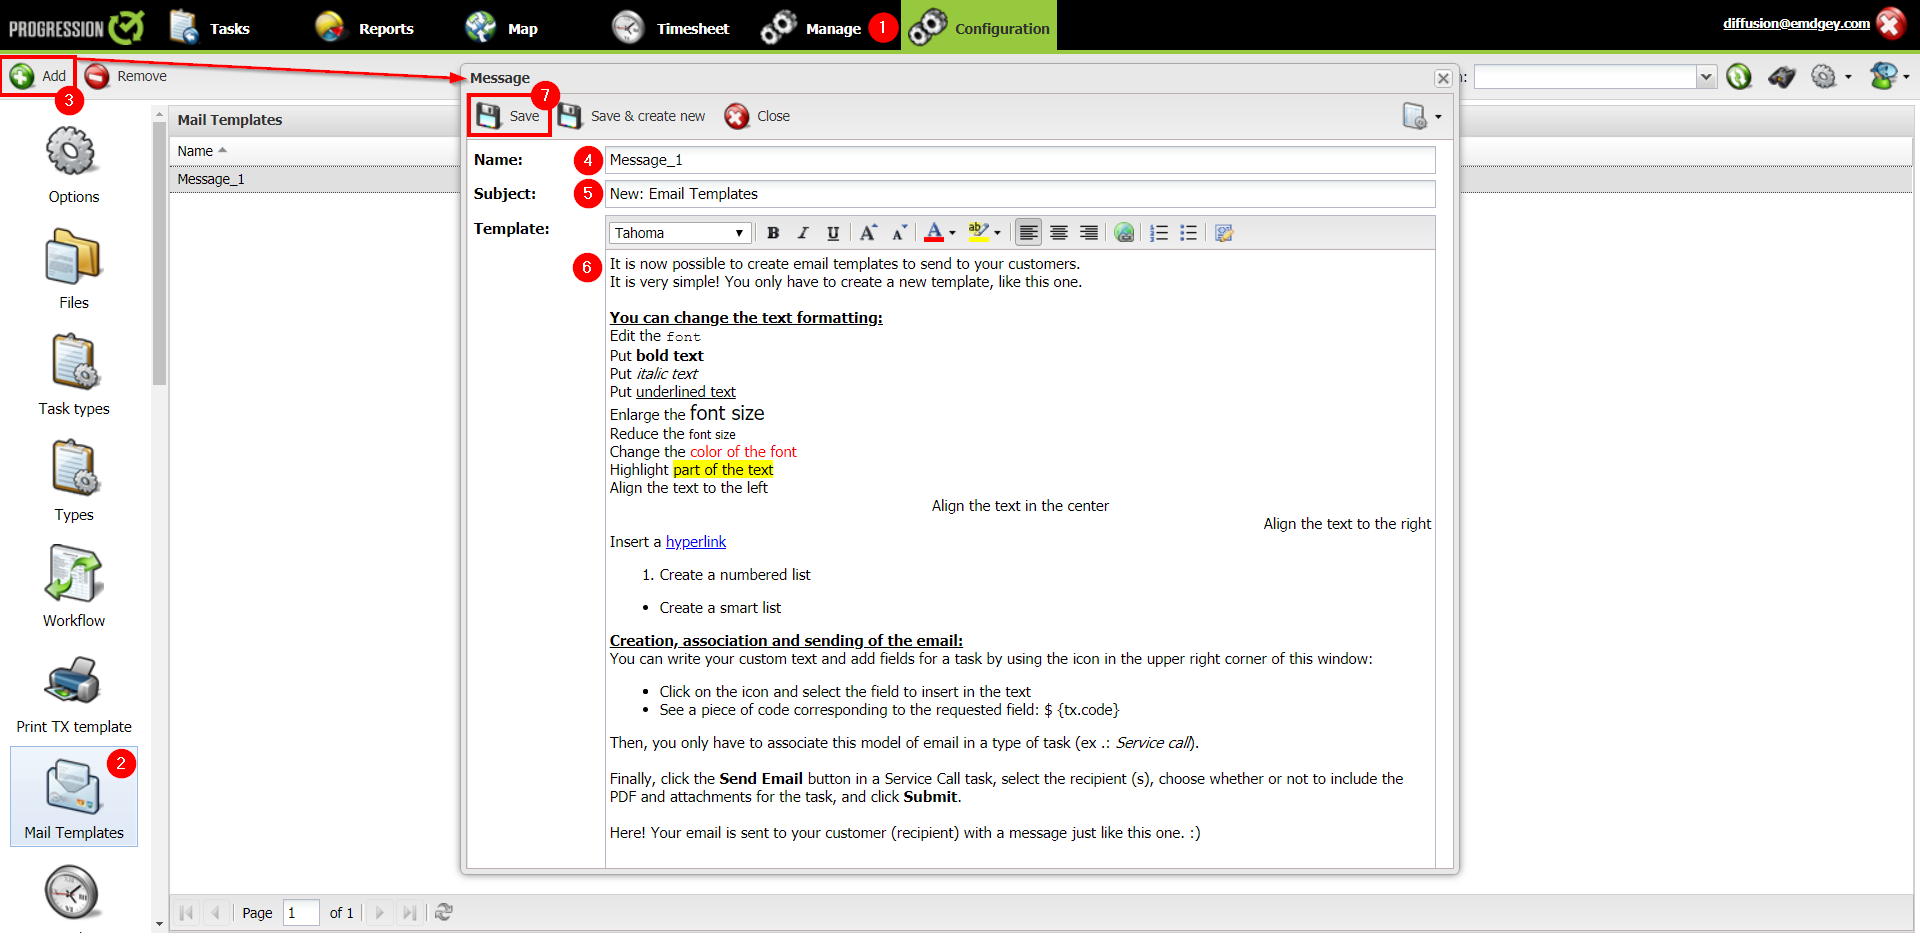
- Access the Configuration menu
- Click Mail Templates
- Click Add
- Enter the name of your template in the Name field (without spaces, hyphens or special characters)
- Enter the subject of your email in the Subject field
- Enter your message in the Template field
- Click Save
Association of the model with the type of task
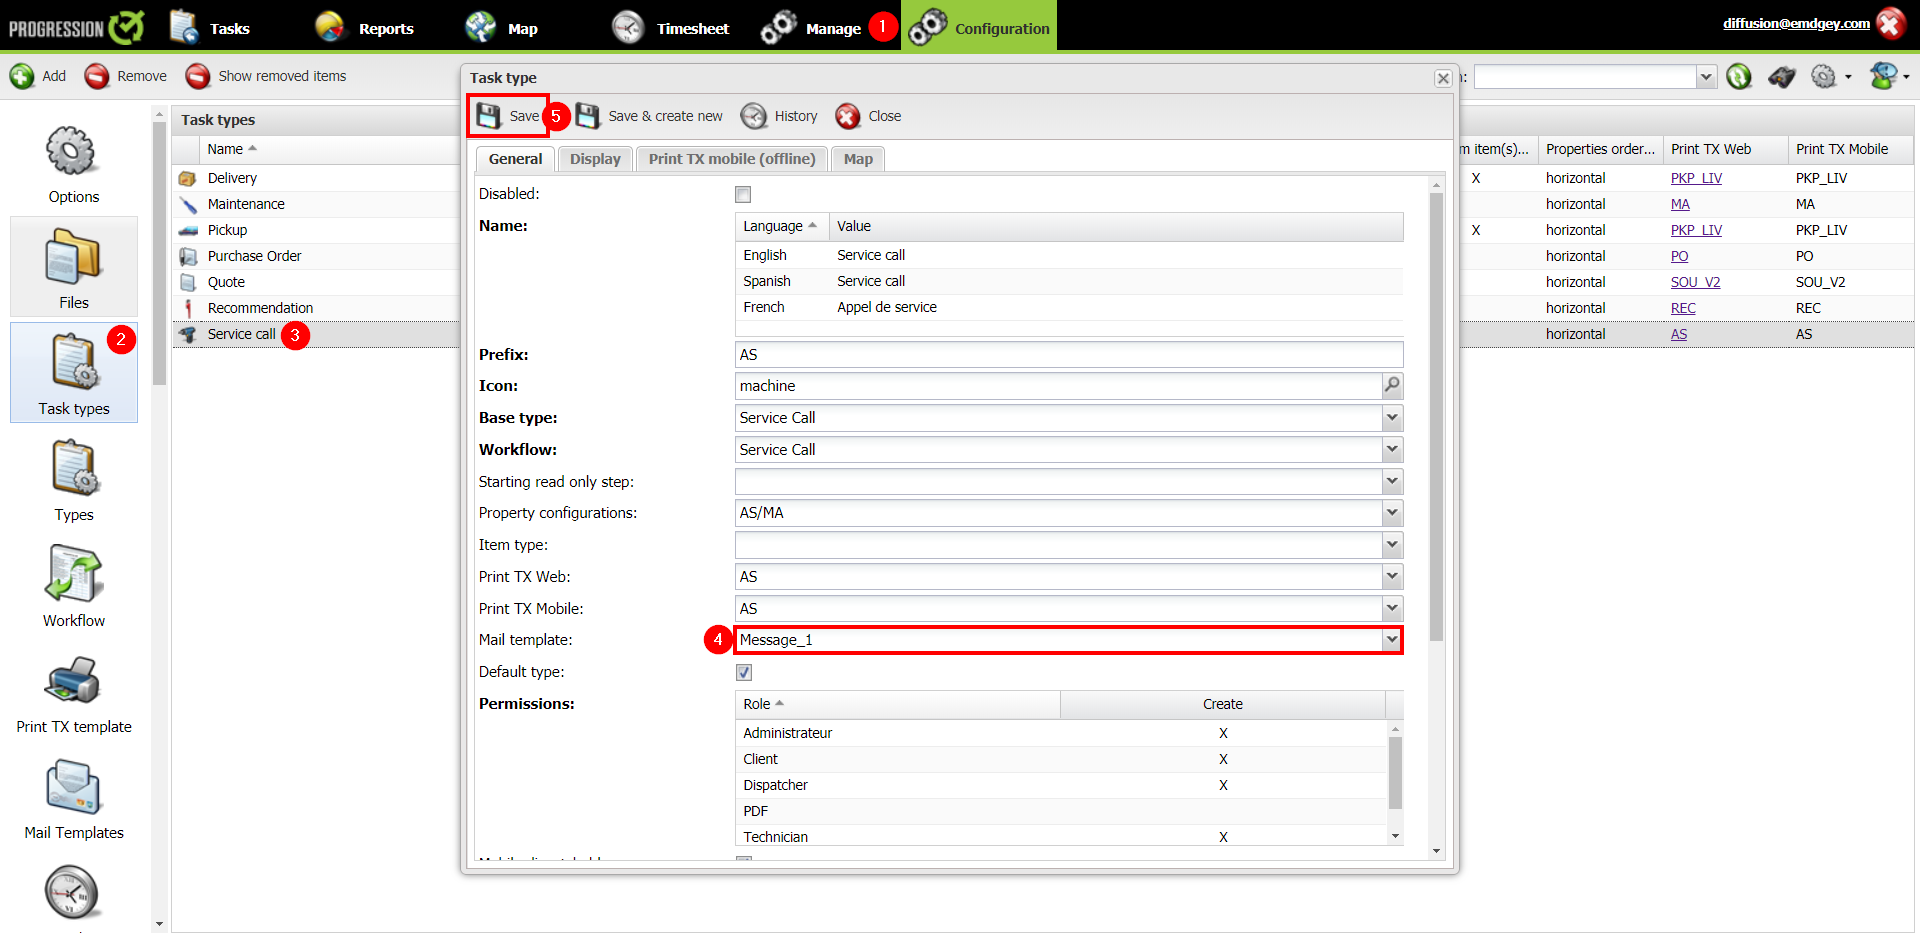
- Access the Configuration menu
- Click Task types
- Double-click the type of task you want to associate the email template with
- Select the desired email template from the drop-down menu in the Mail Template field.
- Click Save
Sending the email to your customer

- In a task, click Send by email
- Enter the email address (es) to which you want to send the email in the Sent to field. (comma-separated)
- Check, if necessary, the boxes to include the PDF or attachments of the task
- Click Send
In case of reply from your client
It is important to note that if your customer replys to your email, it will be sent to the main email address of the account. It is possible to modify it by contacting our technical support.
Bug fixes
We have fixed some bugs.
If you wish to stay informed of the latest ProgressioLIVE updates and news, subscribe to our newsletter.